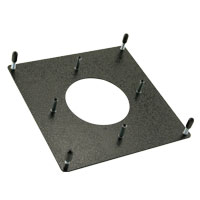
Trackball Mounting
One area of concern for the home arcade builder has always been how to neatly mount a standard trackball on their control panel. Not quite as easy as mounting a joystick or simple pushbutton, trackball mounting requires some planning and a little extra work to get right. This article will detail the options for mounting a standard 3" trackball.
Mounting Plates and Kits
Mounting a trackball in a wood panel is usually done with the aid of a mounting plate or kit.
- Mounting Plates are simple flat metal plates with 8 mounting holes drilled in the appropriate positions. Four holes in each corner of the plate allow the plate to be fastened to your control panel. Four holes around the ball hole are for attaching the trackball itself to the mounting plate.
- Mounting Kits are metal plates with mounting hardware welded onto the back-side. Since the hardware is already attached, no bolt-heads will be visible on the plate's surface.
For a clean bolt-free control panel surface, a mounting kit sunk into your panels' top surface usually considered the best (though not the easiest) solution. By routing an area the same size and thickness as the mounting plate into the control panels surface it is possible to 'sink' the mounting plate into the surface of the control panel. The end result is a mounting plate that is perfectly flush with the surface of your control panel with no bolt-heads showing. Covering the control panel with an overlay will completely hide this mounting method.
Plates and kits are available for all the major brands and sizes of trackball out there.
Templates
Here are some useful trackball template drawings.
- Betson 3" Trackball - Top View (courtesy of Groovy Game Gear)
- Betson 3" Trackball - Bottom View (courtesy of Groovy Game Gear)
