Difference between revisions of "LS-30 Switch Service"
(→Disassembly) |
m (10 revisions) |
||
| (5 intermediate revisions by 2 users not shown) | |||
| Line 2: | Line 2: | ||
[[Image:cap_removal_tool.jpg|thumb|Removal Tool (Former Paper Clip)|80px|right|]]<br> | [[Image:cap_removal_tool.jpg|thumb|Removal Tool (Former Paper Clip)|80px|right|]]<br> | ||
Tools Needed: | Tools Needed: | ||
| − | * Snap | + | * Snap Ring Pliers |
| − | * Home- | + | * Home-Made Top Cap Tool (Heavy Paperclip) |
| − | * Socket | + | * 10mm Socket with Extension |
| + | * Regular Pliers | ||
| − | + | The rotary switches on the LS-30 Sticks are built like tanks, but by now they've often seen enough use to benefit from cleaning and re-greasing. The first stick I cleaned went from 10 ohm to 0.5 ohm contact resistance. So if you have a stick that doesn't doesn't seem to be working right this is worth a try. | |
| − | The rotary switches on the LS-30 Sticks are built like tanks, but by now they've often seen enough use to benefit from cleaning | ||
| − | |||
---- | ---- | ||
| Line 15: | Line 14: | ||
There's a simple way to get the handles off! I don't think I would have figured this out without this [http://forum.arcadecontrols.com/index.php?topic=13028.0 forum post.] | There's a simple way to get the handles off! I don't think I would have figured this out without this [http://forum.arcadecontrols.com/index.php?topic=13028.0 forum post.] | ||
| − | + | The first thing you need to do, if you don't have the plastic knob removal tool, is to make a little tool to pop out the center cap.<br> | |
| + | |||
| + | [[Image:cap_removal_tool.jpg]] | ||
| + | |||
| + | Then locate the 2 small nubs on the bottom of the joystick handle, this is where you need to use the tool to release the center cap. Just press up (towards the SNK logo on the knob) with the tool to release the tabs on the center cap.<br> | ||
| + | |||
[[Image:cap_removal.jpg]] | [[Image:cap_removal.jpg]] | ||
| − | Hold the top and loosen the 10mm | + | Hold the top and loosen the 10mm nut inside. Once loosened the top will slide off easily.<br> |
[[Image:top_nut.jpg]] | [[Image:top_nut.jpg]] | ||
| Line 35: | Line 39: | ||
Once the case is open you can remove the contact carrier, circuit board and detent assembly. The circuit board is secured to the case but comes off with a little gentle prying (I said gentle). Be very careful removing the detent assembly under the circuit board as it contains several tiny parts that are easily lost (two springs, two small metal plates, and two cylindrical rollers). <br> | Once the case is open you can remove the contact carrier, circuit board and detent assembly. The circuit board is secured to the case but comes off with a little gentle prying (I said gentle). Be very careful removing the detent assembly under the circuit board as it contains several tiny parts that are easily lost (two springs, two small metal plates, and two cylindrical rollers). <br> | ||
| − | Here are the parts after | + | Here are the parts after disassembly <br> |
[[Image:dirty_switch_parts.jpg]] [[Image:dirty_switch_top.jpg]] | [[Image:dirty_switch_parts.jpg]] [[Image:dirty_switch_top.jpg]] | ||
| Line 48: | Line 52: | ||
If the switch wasn't working properly it may be a good idea to bend the switch contacts up a tiny bit to make better contact. It should be easy to tell if this is necessary. Once all the parts are back in the upper switch housing, just look at it from the side and make sure all three contacts are touching the board. I wouldn't bend the contacts unless it obviously needs to be done. | If the switch wasn't working properly it may be a good idea to bend the switch contacts up a tiny bit to make better contact. It should be easy to tell if this is necessary. Once all the parts are back in the upper switch housing, just look at it from the side and make sure all three contacts are touching the board. I wouldn't bend the contacts unless it obviously needs to be done. | ||
| + | |||
| + | [[Image:LS-30_assembly1.jpg]] | ||
| + | [[Image:LS-30_assembly2.jpg]] | ||
| + | [[Image:LS-30_assembly3.jpg]] | ||
| + | [[Image:LS-30_assembly4.jpg]] | ||
Latest revision as of 09:23, 5 December 2013
Tools Needed:
- Snap Ring Pliers
- Home-Made Top Cap Tool (Heavy Paperclip)
- 10mm Socket with Extension
- Regular Pliers
The rotary switches on the LS-30 Sticks are built like tanks, but by now they've often seen enough use to benefit from cleaning and re-greasing. The first stick I cleaned went from 10 ohm to 0.5 ohm contact resistance. So if you have a stick that doesn't doesn't seem to be working right this is worth a try.
There's a simple way to get the handles off! I don't think I would have figured this out without this forum post.
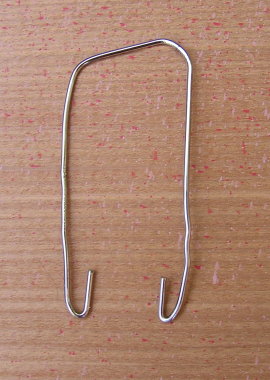
The first thing you need to do, if you don't have the plastic knob removal tool, is to make a little tool to pop out the center cap.
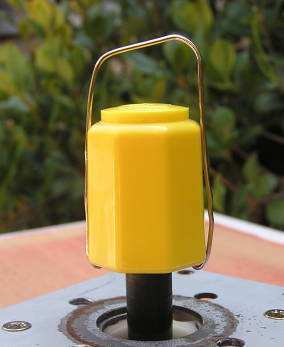
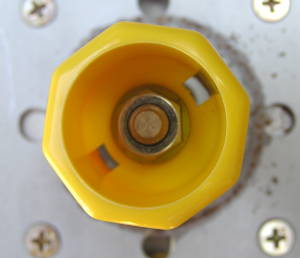
Then locate the 2 small nubs on the bottom of the joystick handle, this is where you need to use the tool to release the center cap. Just press up (towards the SNK logo on the knob) with the tool to release the tabs on the center cap.
Hold the top and loosen the 10mm nut inside. Once loosened the top will slide off easily.
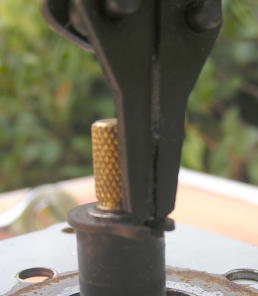
Remove the snap ring (you really do need snap ring pliers for this)
You should be able to pull the switch assembly out of the body at this point.
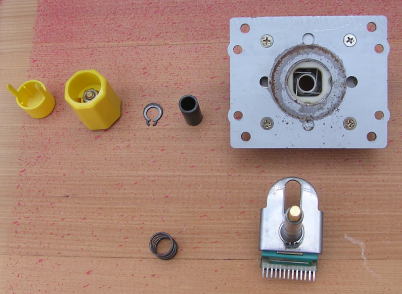
The outer sleeve part of the switch assembly shaft unscrews from the base. In order to protect the shaft from marring I wrapped it in several layer of electrical tape before unscrewing it with a pair of pliers.
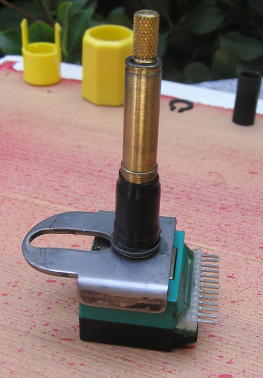
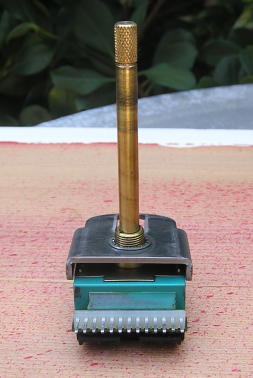
Straighten the four bent tabs on the top of the switch housing and gently work the case apart. It helps to push the tabs down from the top.
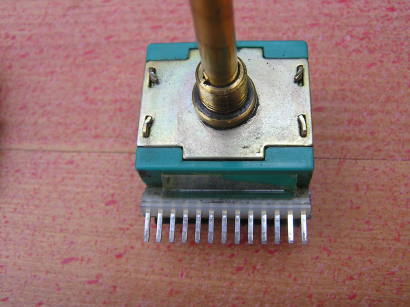
Once the case is open you can remove the contact carrier, circuit board and detent assembly. The circuit board is secured to the case but comes off with a little gentle prying (I said gentle). Be very careful removing the detent assembly under the circuit board as it contains several tiny parts that are easily lost (two springs, two small metal plates, and two cylindrical rollers).
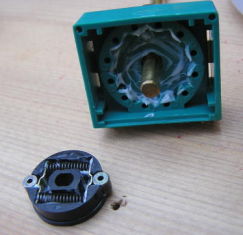
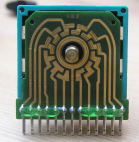
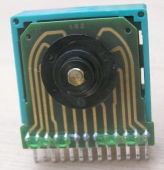
Here are the parts after disassembly
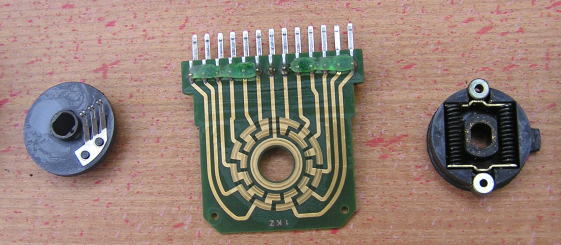
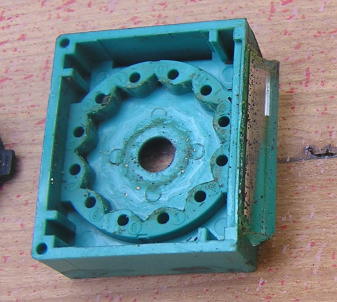
The grease had dried up and the blue upper housing had started to wear. As well, smell flecks of metal had worn of the shaft and made their way into the switch. This switch actually read fine with a multimeter, but I'd say it will live a lot longer after cleaning and re-greasing.
Here they are after cleaning. The circuit board was cleaned with alcohol and treated with Deoxit D5 contact cleaner (fantastic stuff by the way)
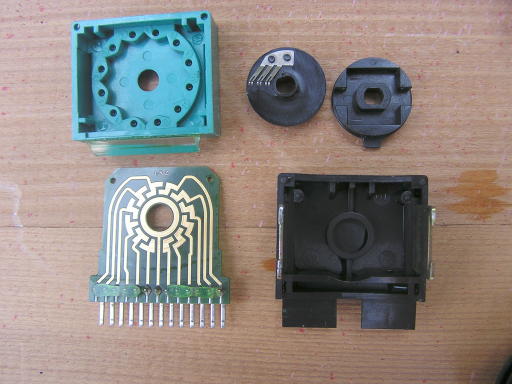
New grease was put on where it had been applied originally. I used Molykote EM-30L as I had some from lubricating a spinner. It's a light, plastic safe lithium grease.
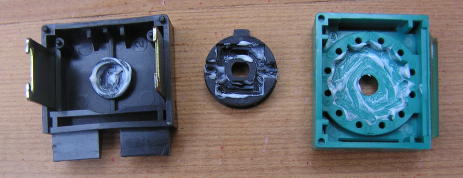
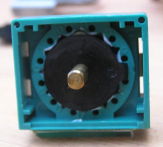
If the switch wasn't working properly it may be a good idea to bend the switch contacts up a tiny bit to make better contact. It should be easy to tell if this is necessary. Once all the parts are back in the upper switch housing, just look at it from the side and make sure all three contacts are touching the board. I wouldn't bend the contacts unless it obviously needs to be done.


